On this page6 sections
Key takeaway
How to vacuum old blown-in insulation out of an attic yourself: the machine that works, safety gear, a step-by-step sequence, and when to call a pro.
01Can you actually vacuum insulation out yourself?
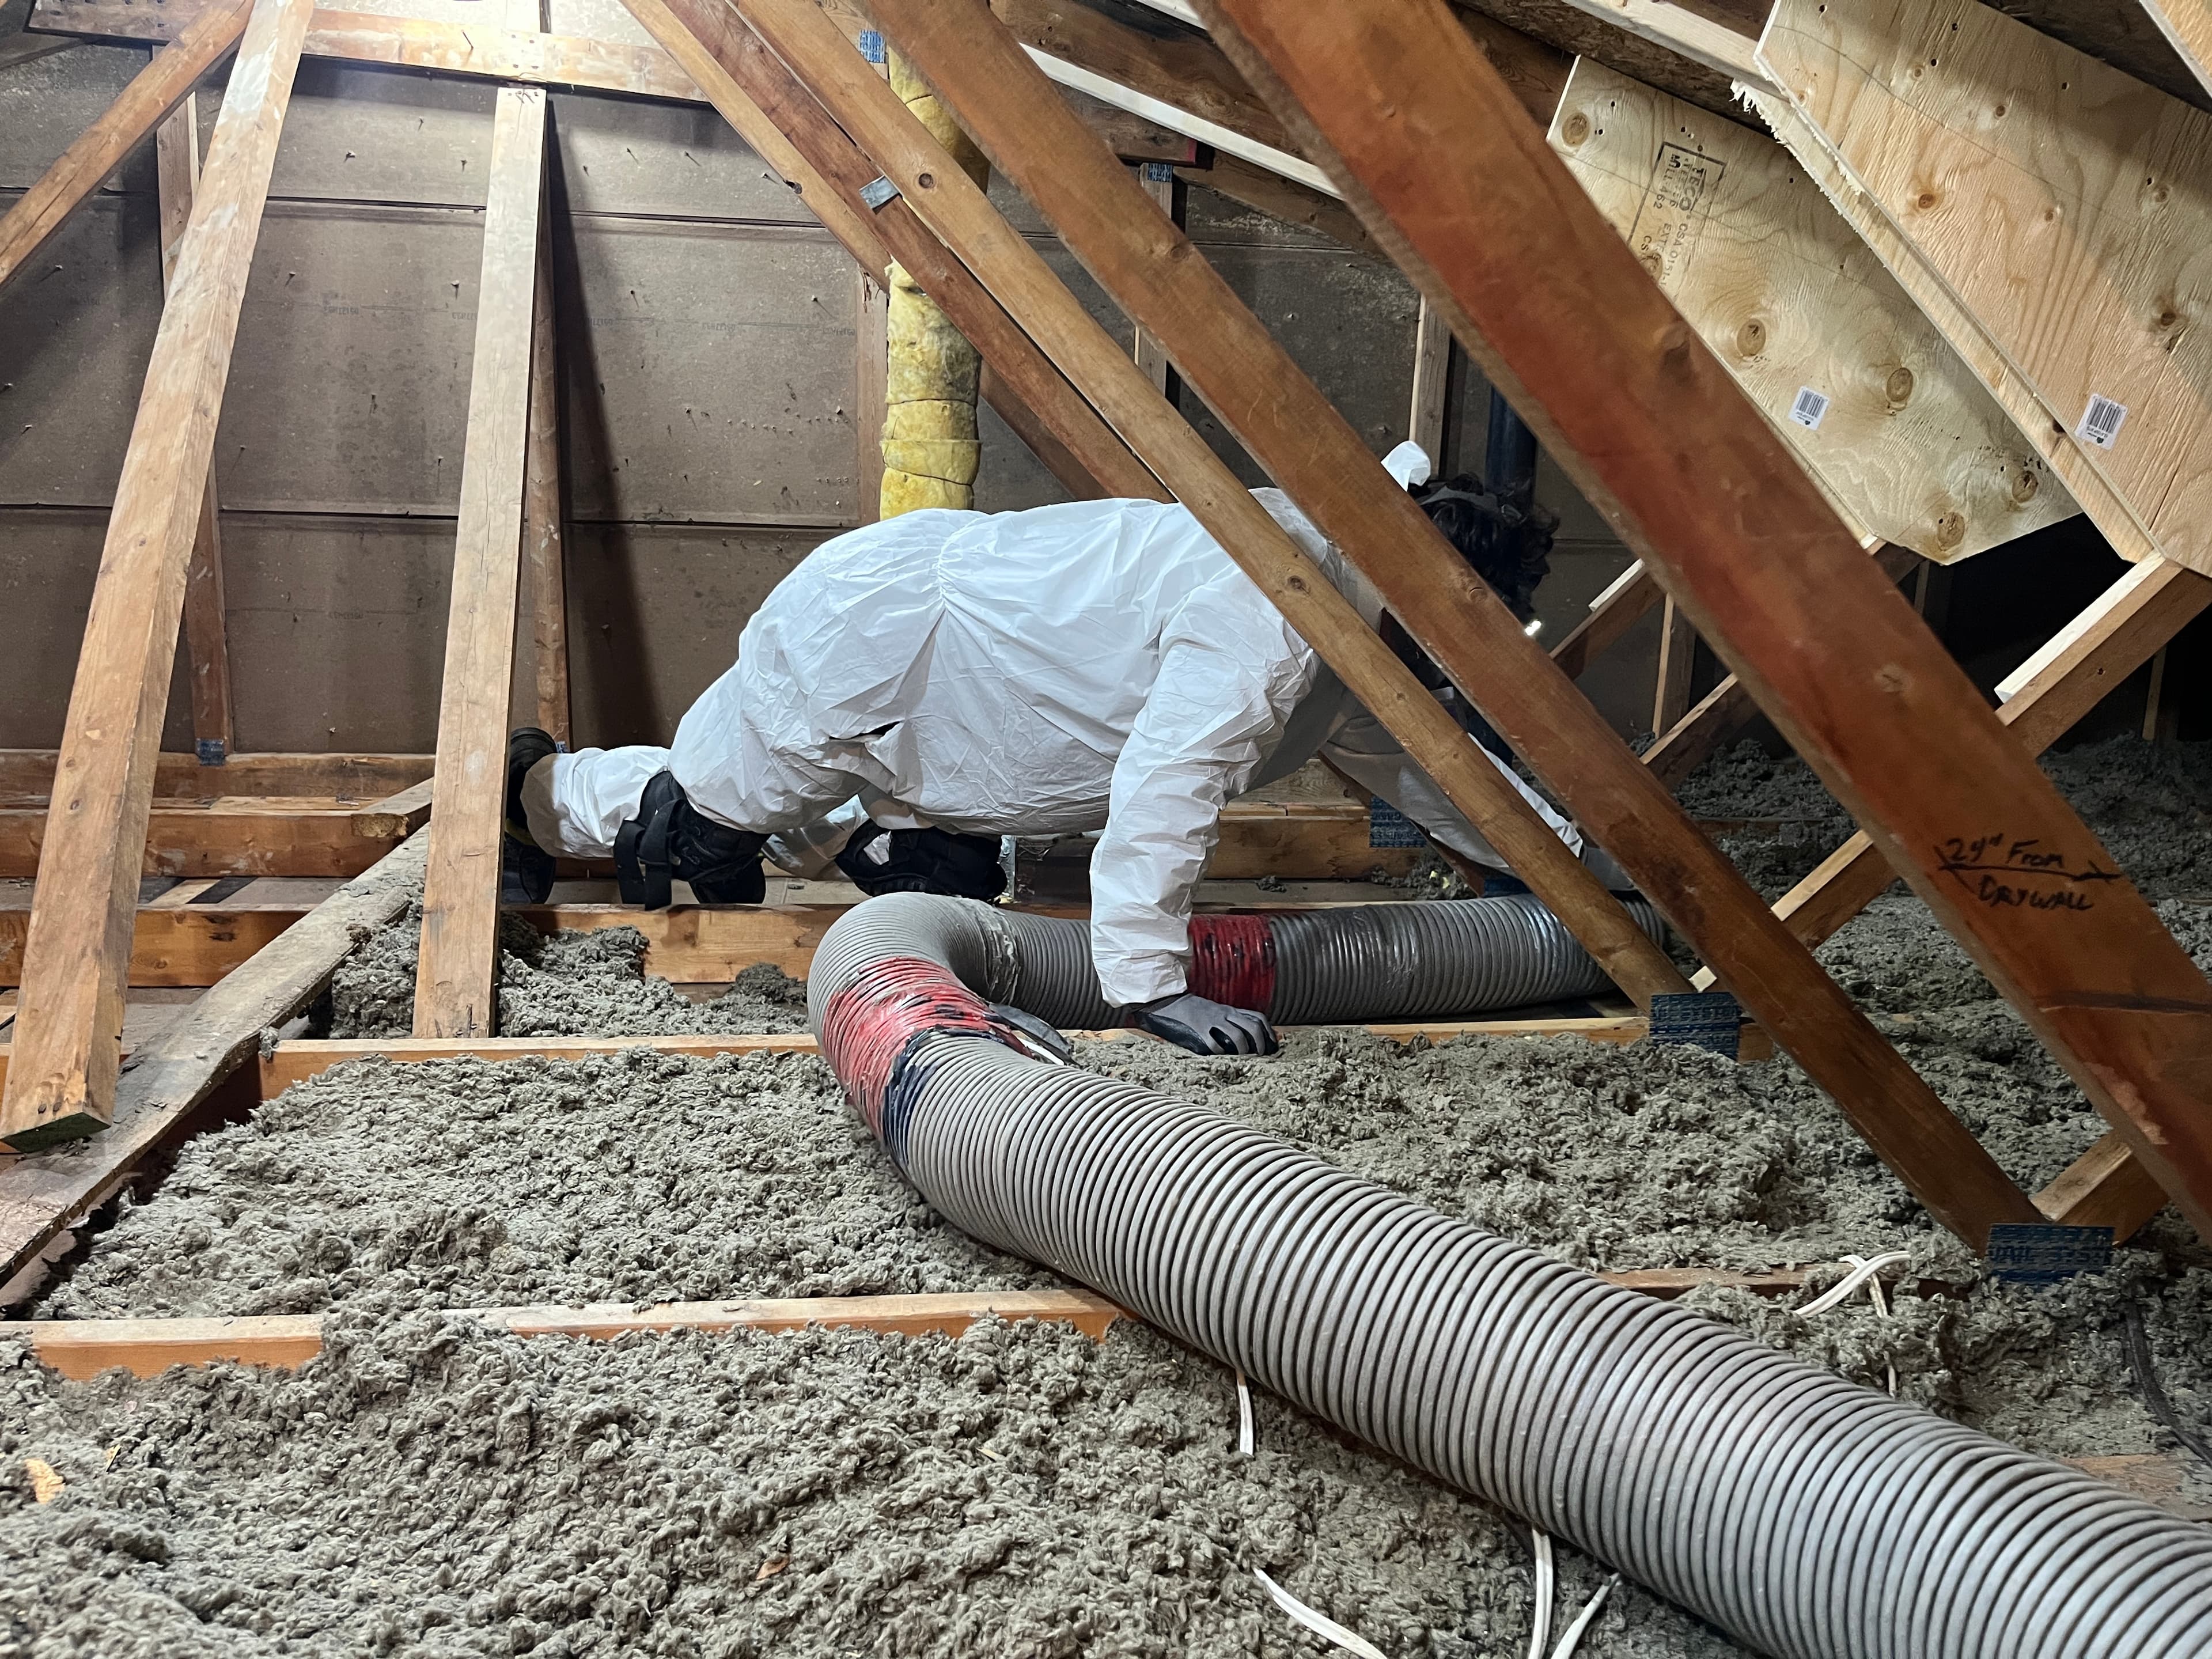
Yes, for most straightforward attics. Blown-in fibreglass and cellulose are loose material, and a purpose-built insulation vacuum lifts them through a wide hose into disposal bags without anyone having to shovel the attic by hand.
The equipment is what decides whether the job is realistic. A household or workshop shop vac is not built for this: the intake is far too narrow for the volume, the filter blinds over almost immediately, and the drum fills in minutes. People who start an attic with a shop vac usually stop within the first hour.
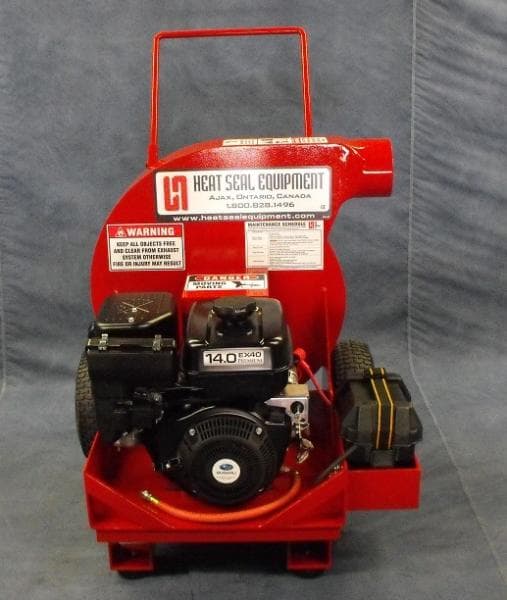
A contractor-grade machine is a different category of tool. The unit we rent runs a 14 HP engine with a 6-inch inlet and up to 100 feet of hose, which is what lets it sit outside the house and still reach the far corners of an attic.
02Before you start: three things to check
First, identify the material. Loose fibreglass and cellulose are routine. Vermiculite is not — it is a pebble-like material found in some older homes, and Health Canada advises treating it as potentially asbestos-containing unless testing has confirmed otherwise. If the attic contains anything resembling vermiculite, stop and have it assessed before anything is disturbed.
Second, look for the reasons removal might not be a DIY job at all: standing moisture, active leaks, heavy mould growth, or significant pest contamination. Each of those changes the work from moving material to handling a contaminated environment.
Third, plan the route. The hose has to travel from the machine to the attic hatch, and the bags have to come back out the same way. Knowing where the machine will sit, which door or window the hose runs through, and where the filled bags will be staged saves a great deal of improvisation later.
03Safety gear is not optional
Attic removal generates a large amount of airborne dust, and old insulation carries whatever has settled into it over decades. A properly fitted respirator, sealed eye protection, gloves, and full-coverage clothing are the baseline. Natural Resources Canada notes that attic work warrants protection against dust and irritants before any material is disturbed.
Ventilation matters as much as the mask. Attics get hot quickly, and the work is physical. Give yourself a way to get fresh air and take breaks rather than trying to clear the whole space in one continuous push.
Protect the path through the house as well. Floor covering from the hatch to the exit keeps the mess contained and makes the cleanup at the end considerably shorter.
04The sequence that works
Set the machine outside and run the hose to the attic hatch, sealing around the opening as well as you reasonably can. Working from the far end of the attic back toward the hatch means you are never crawling across a section you have already cleared.
Stay on the joists or on planks laid across them. The ceiling drywall between joists will not carry your weight, and this is the single most common way a removal job turns into a repair job.
Work in sections and keep the hose moving steadily rather than trying to force a large volume at once. As bags fill, seal and stage them near the exit rather than leaving them scattered through the attic.
When the floor is exposed, stop and look before adding anything new. An empty attic is the only time you will easily see the top plates, wiring penetrations, bathroom fan ducts, and any staining that indicates a past or present leak. That is the moment to plan air sealing and to confirm ventilation baffles are clear at the eaves.
05What it costs to do it yourself
Renting the vacuum is $380 for the first day and $280 for each additional day, with insulation bags at $40 each. Delivery and pickup across the GTA are available, or the unit can be picked up.
Bag count is usually the part people underestimate, and running out mid-job stalls everything. Our bag capacity and cost guide walks through a simple way to estimate the number you will need from your attic's square footage and insulation depth before you book.
Set against a professional removal, the DIY route trades money for labour and time. You are handling the bagging, the hauling, the disposal, and the physical work in a hot attic — and you do not get the post-removal inspection that comes with a full service job.
06When to stop and call someone
Suspected vermiculite is the clearest case: leave it undisturbed and have it assessed. The same applies to significant mould growth, which needs to be identified and addressed rather than vacuumed through.
Beyond contamination, the practical limits are access and structure. Low clearance, a cut-up roofline with several disconnected sections, knob-and-tube wiring, or an attic with no usable hatch all make a DIY attempt considerably harder than it looks from the floor below.
There is no penalty for starting and reassessing. If the attic turns out to be more than expected once you can see it properly, that is useful information rather than a failure.
Frequently asked questions
Can I use a shop vac to remove attic insulation?
Not practically. A shop vac's intake is too narrow and its filter blinds over almost immediately with insulation dust, so the drum fills in minutes and the job stalls. Attic removal needs a machine built for high volume — the unit we rent uses a 6-inch inlet and up to 100 feet of hose so it can stay outside the house.
How long does DIY attic insulation removal take?
It depends on attic size, access, and how much material is in place. Plan for the work to take longer than the vacuuming itself: setup, bagging, hauling, and cleanup all add time, and attic conditions make sustained work harder than the same effort at ground level.
What should I do once the attic is empty?
Inspect before you cover anything. An exposed attic floor is the easiest opportunity you will get to spot moisture staining, air leaks at top plates and penetrations, and blocked ventilation at the eaves. Air sealing is far simpler at that stage than after new insulation is installed.
Do I need to remove old insulation before adding new?
Not always. Insulation that is dry, clean, and evenly distributed can often be topped up instead. Removal is the better path when the material is wet, mouldy, pest-contaminated, or covering problems that need to be fixed first.
Sources
- 1.Keeping the Heat In — Health and safety considerations — Natural Resources Canada
- 2.Asbestos and your health — Health Canada
Written by
Attic Vac Insulation
A licensed and insured attic insulation contractor removing, installing and topping up insulation in homes across Toronto and the GTA, and renting the same 14 HP vacuum we work with.